
I have been searching for an authentic vintage aluminum Christmas tree for quite some time. If I choose, I can spend several hundred dollars to acquire one or simply keep browsing my nearby thrift stores, garage sales, and estate liquidations, confident that eventually, I will stumble upon one at a price I find acceptable. I am opting for the latter. Until that moment, I realized there had to be a method for me to create a DIY version on a budget to showcase some of my vintage ornaments. Additionally, I am aware that I have numerous vintage-loving friends here who would also value this project. So, let’s construct a DIY Vintage Aluminum Christmas Tree that serves as a fantastic substitute until we discover the authentic article!
What Constitutes a Vintage Aluminum Christmas Tree?
If you have ever viewed retro holiday images from the 1950s or 1960s, you have likely seen a gleaming, shimmering aluminum Christmas tree. These nostalgic trees were fabricated with metallic tinsel branches that reflected light exquisitely and have gained significant collectibility in modern times. Original vintage aluminum Christmas trees can be quite costly. Typically, they can range in price, depending on size, condition, and brand. This DIY Vintage Aluminum Christmas Tree serves as a wonderful alternative until you can procure the genuine item.
{This article contains affiliate links. Click on any of the highlighted links to discover the products I am discussing. You can view my disclosure.}
Materials Required To Craft A DIY Vintage Aluminum Christmas Tree
* NOTE: I am still searching for the ideal base for my DIY Vintage Aluminum Christmas Tree. I wish to find something decorative and metallic, similar to a lamp base. I made every effort to locate something before I published this article, but it did not happen. Rest assured, once I find it, I will be replacing the tree’s original base. I enjoy swapping out mundane bases for distinctive ones. I have shared some of my favorite changes I’ve made over the years in my post HERE.
Simple Step-by-Step Guide For This DIY Vintage Aluminum Christmas Tree
- To begin, we laid out each tier of branches on the tree so that they wouldn’t get tangled with branches from above or below their respective level.
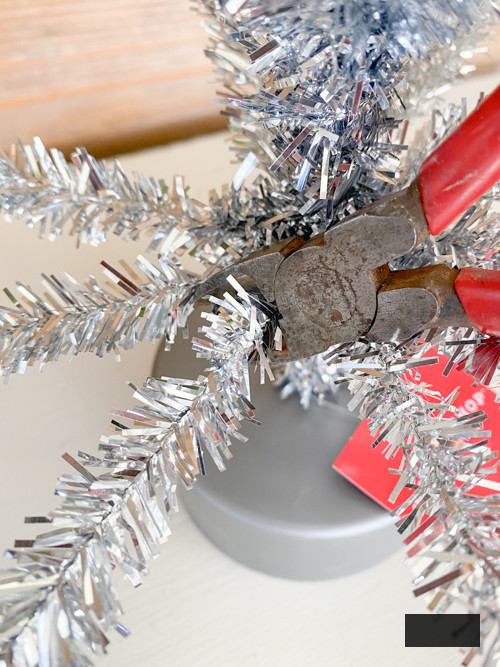
- Subsequently, we decided to alternate the amount we trimmed for each row. We commenced with the bottom row, using the cutters to snip every third branch. For the next level, we trimmed every other one.
- We maintained this pattern all the way up the tree. You want it to appear less dense, mimicking a genuine vintage aluminum tree.
- Next, we affixed a silver bell to the end of each branch. We did not require glue; they fit securely at the tips of the branches.
- After that, you are set to adorn your vintage ornaments!
- As mentioned earlier, I will replace the base of my tree once I discover the perfect piece.

I appreciate how it turned out.


It is the ideal-sized tree for a coffee table, too.

It is incredibly simple to create, and you don’t require many tools to complete the project. Just one!

Anyone can accomplish this.

And, with an investment of less than $20, I am content with this until the genuine one emerges during my search someday.
PIN THIS POST!
If you enjoyed this DIY Vintage Aluminum Christmas Tree, you will also appreciate these projects:
Dollar Store Christmas Swags DIY
DIY Scandinavian Advent Calendar
DIY Velvet Christmas Ornaments