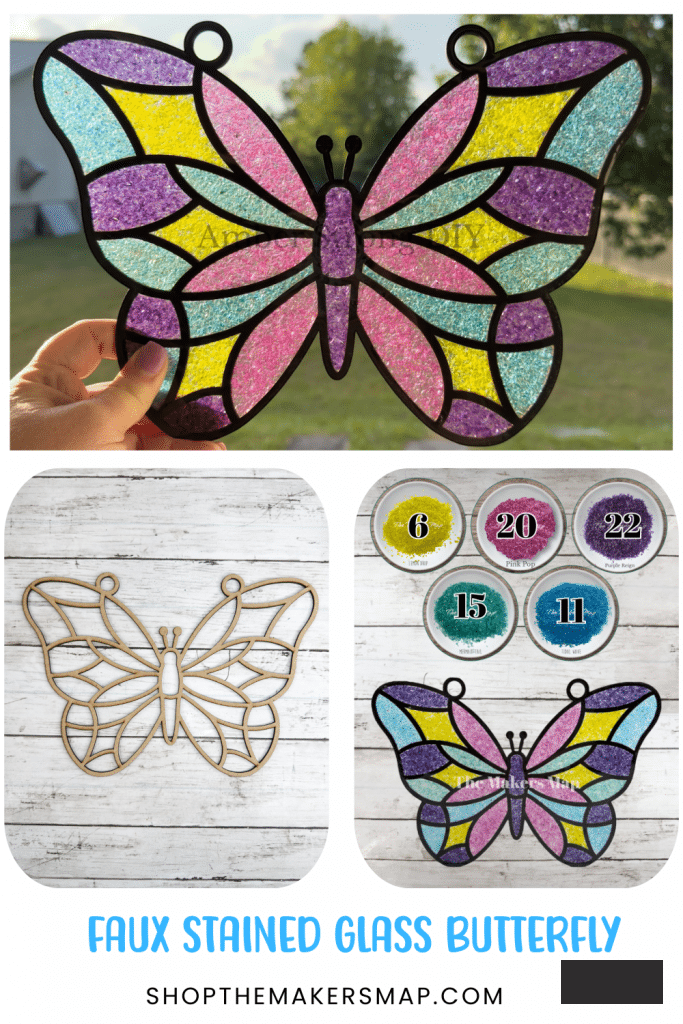
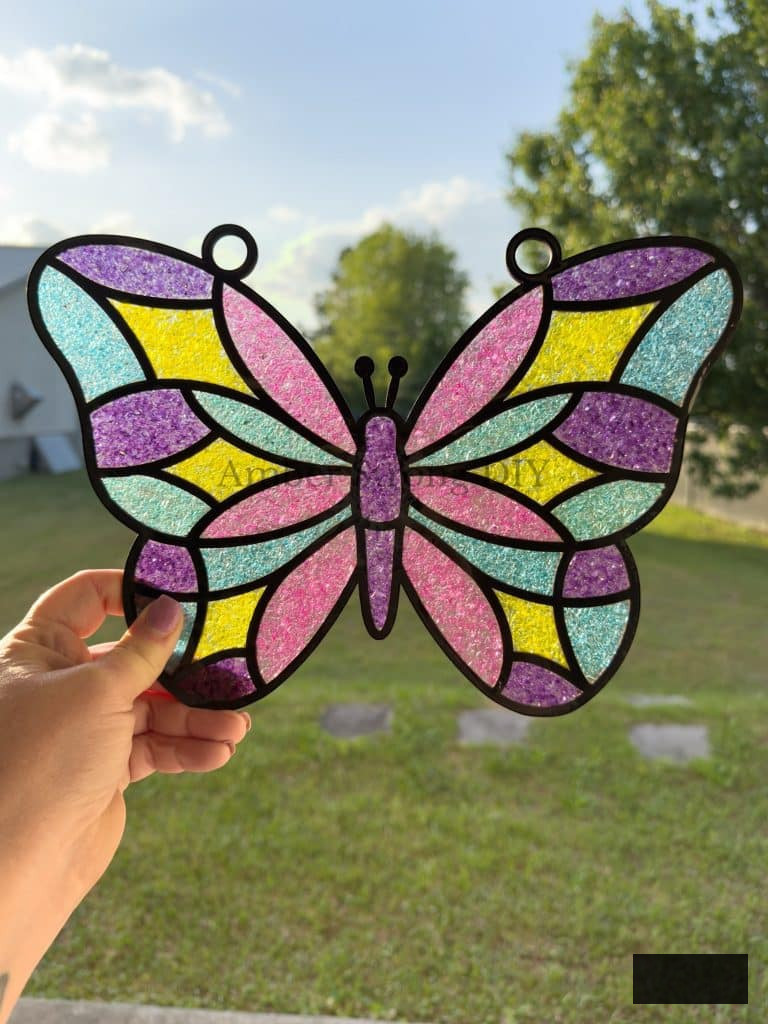
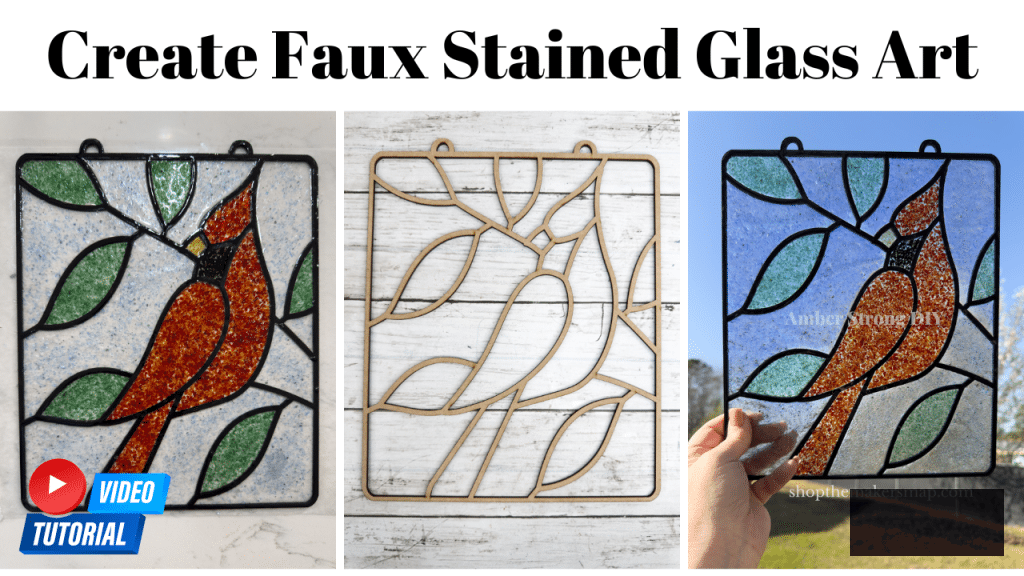
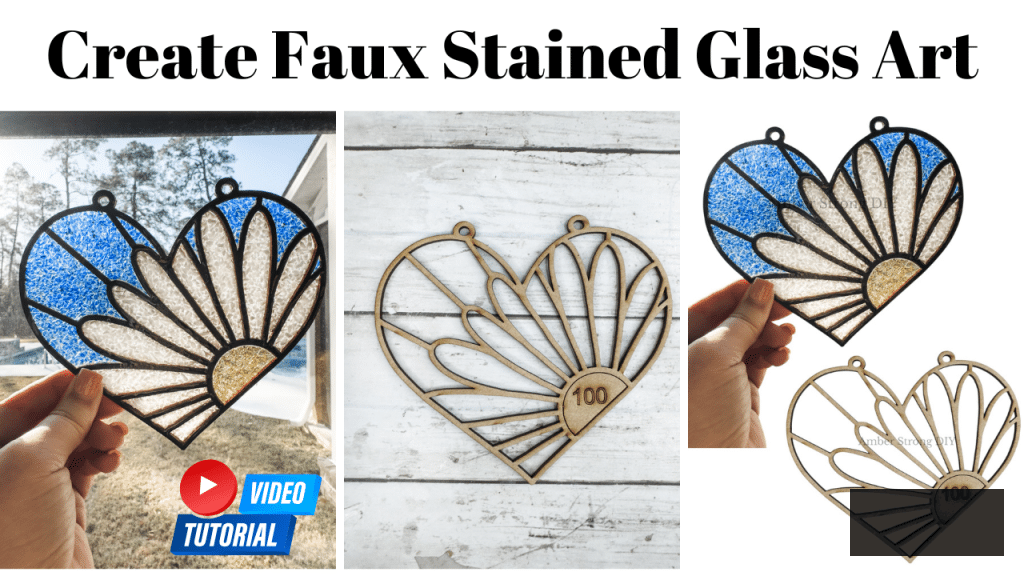
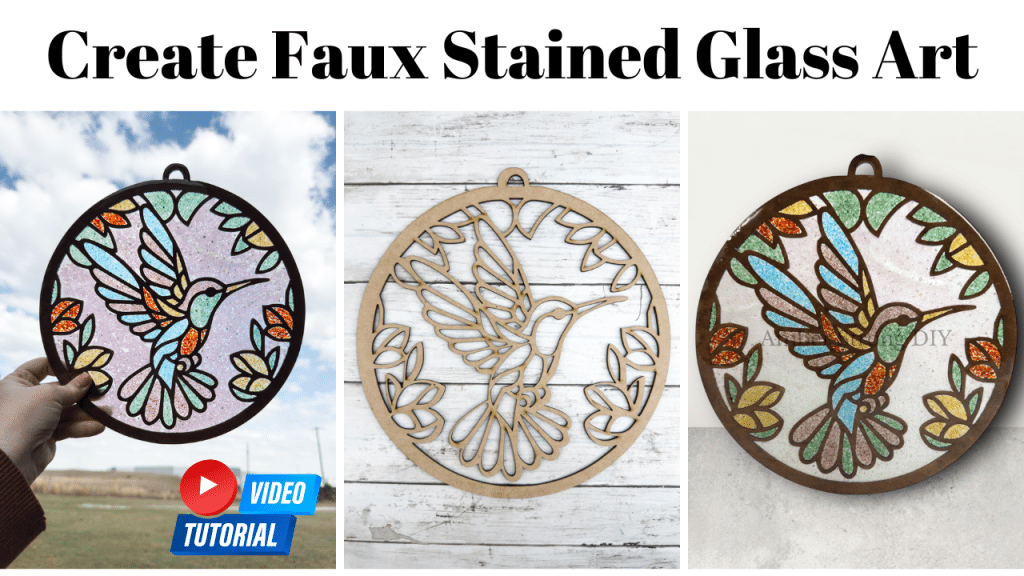
Add a splash of hue to any window with this simple and lovely DIY Faux Stained Glass Butterfly Sun Catcher! Constructed using laser-cut timber and vibrant crushed glass, this faux stained glass venture is an ideal method to introduce a bit of brightness indoors.
This undertaking is beginner-friendly and serves as a fantastic weekend project. Just paint or stain your butterfly outline, turn it over, and apply paper transfer tape to the back to secure your crushed glass in position. Fill each section with your preferred sparkly glass fragments, then pour in resin to bond everything together. After curing, remove the transfer tape, attach a chain for hanging, and relish your handmade creation!
Whether you’re crafting alone or leading a workshop, this butterfly design is a delightful and striking method to unleash your creativity with color.
Watch the DIY Faux Stained Glass Butterfly Sun Catcher video tutorial below.
EXPLORE MY CRAFT KITS
Add Charm with This DIY Faux Stained Glass Butterfly Sun Catcher
Seeking a creative endeavor that’s both calming and stunning to showcase? This DIY Faux Stained Glass Butterfly Sun Catcher is a perfect approach to introduce lively colors and whimsy into your home!
Created with laser-cut timber and sparkling crushed glass, this kit simplifies the process of achieving the appearance of authentic stained glass—no specialized tools or expertise needed. The elegant butterfly design embodies transformation and nature’s allure in a breathtaking piece.
Whether you hang it in a sunlit window or present it to a fellow artist, this project provides a fun and fulfilling opportunity to get artistic. Ideal for novices, workshop facilitators, or anyone who enjoys blending art with shimmer!
Step-by-step guide to produce DIY Faux Stained Glass Butterfly Sun Catcher:
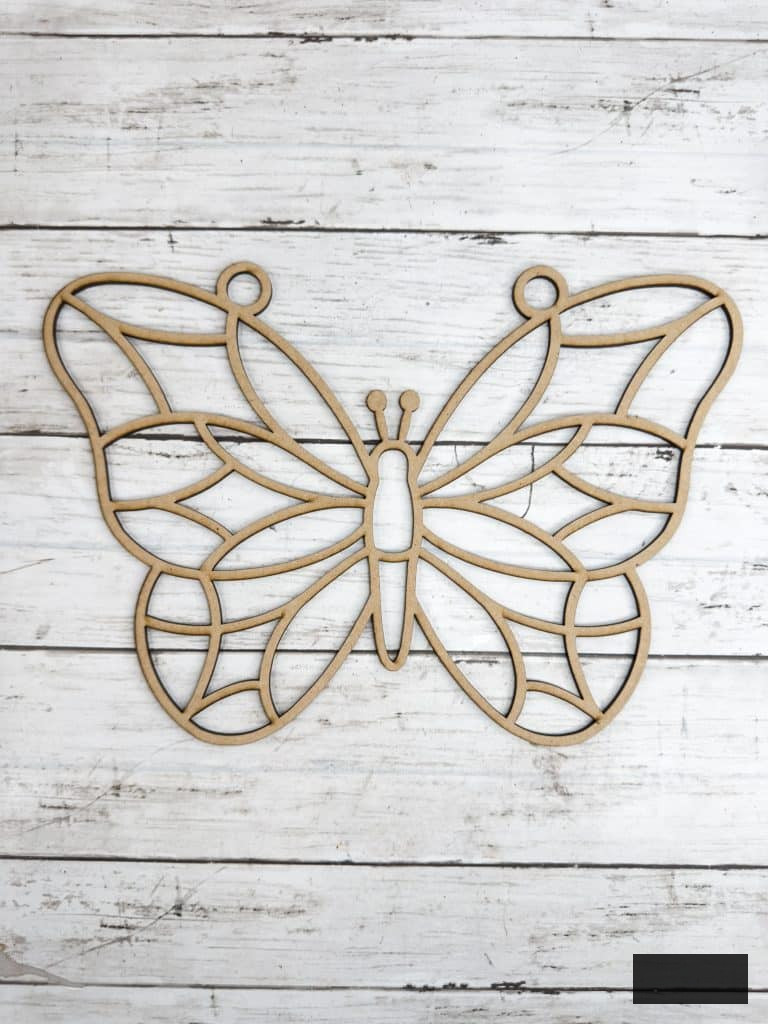
1. Stain or Paint the Outline
Color the butterfly wood outline black for a stained glass effect, or stain it for a natural wood aesthetic. Allow to dry thoroughly.
2. Apply Transfer Tape
Turn the outline face-down and apply paper transfer tape to the back. Press firmly to ensure all open areas are sealed. A brayer can be utilized to help adhere the transfer tape securely to the back of the laser-cut wood outline frame.
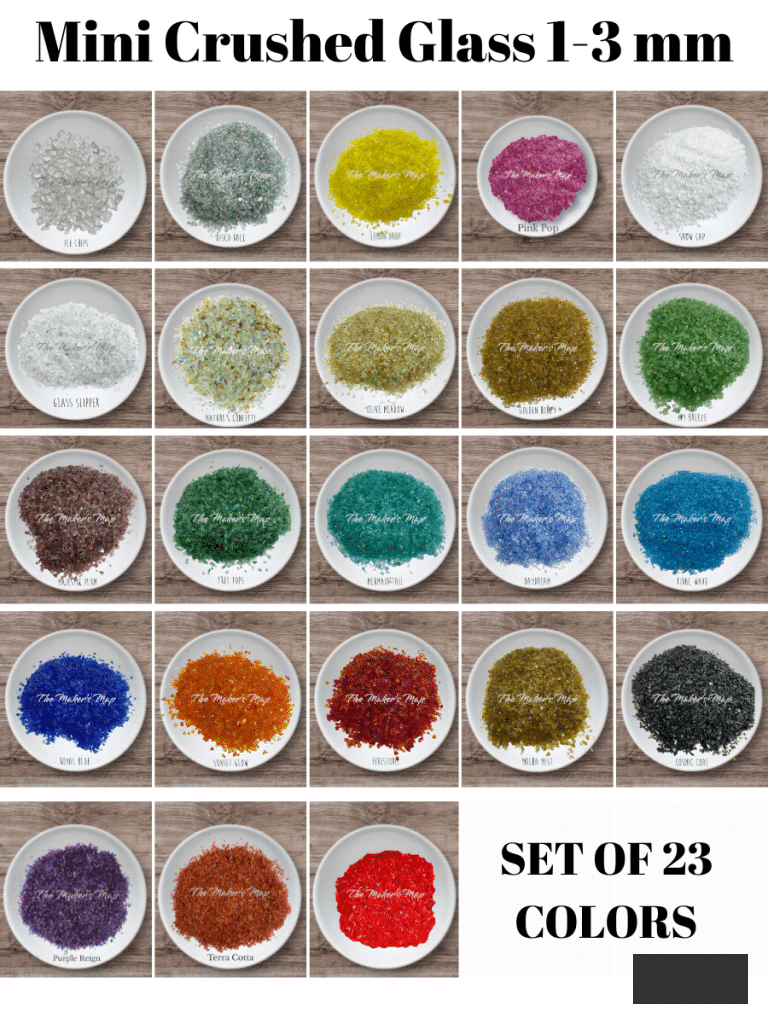
3. Insert Crushed Glass
With the outline now facing up, fill each compartment with the suitable crushed glass hues. We offer numerous fun crushed glass shades that you can discover here!
4. Mix & Cure Resin
Combine your resin according to the manufacturer’s instructions. Gradually pour resin over the crushed glass to fill each compartment. Allow it to cure completely if you’re using epoxy resin. For UV resin, ensure to use clear transfer tape so you can cure both sides of the piece.
5. Remove & Seal
Once cured, gently peel off the transfer tape. Admire your creation! If you wish to apply an additional coat of resin for sealing, feel free, but it’s not necessary!
6. Attach & Enjoy
Insert string or hooks through the upper openings and display your completed sun catcher in a sunlit window! Remember, resin can yellow over time—perhaps not immediately, but it can happen. Avoid placing in direct sunlight. Display in a shaded area.
Crushed Glass for Crafts
We utilize recycled crushed glass to create our faux stained glass artworks. Explore the complete glass collection here. We also have natural shell crushed glass available!
Whether you’re crafting for pleasure, selling your creations, or hosting a workshop, this project is a real standout. It’s beginner-friendly, therapeutic to produce, and entirely customizable for any theme or season.
How to Make Simple DIY Faux Stained Glass Butterfly Art
Craft Gatherings, Paint Events, Workshops, and Classes
We provide bulk laser-cut outline designs for craft gatherings, classes, and workshops. Purchase bulk packs here!
✨ Prepared to begin? Discover laser-cut designs and more at shopthemakersmap.com
We offer 6 inch and 12 inch options for these laser wood outlines. We have wholesale bulk packs available in sets of 6, 12, and 18. Browse the collection here.
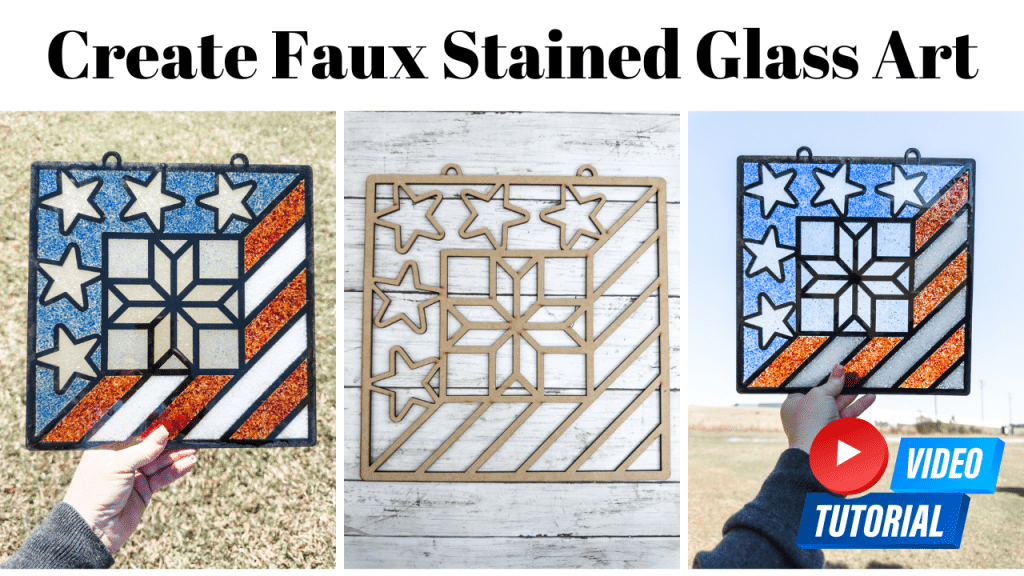
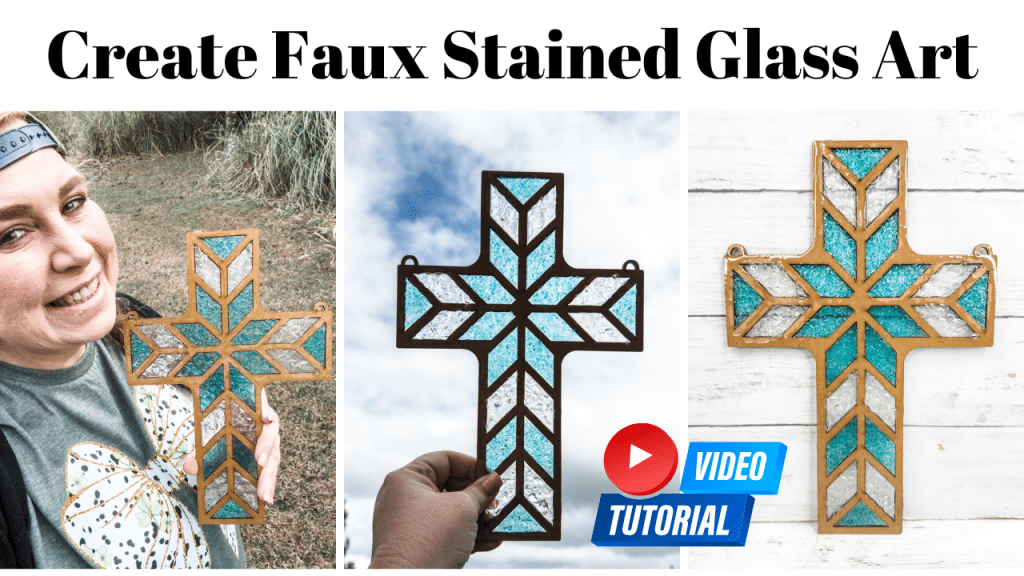
Explore these other faux stained glass tutorials below.
Materials list
Obtain your printed guidelines and materials list here.
Materials you require:
I compiled a list in my Amazon Store Click Here
Resin /Epoxy (alternative option is Liquid Glass)
Crushed Glass, glitter, alcohol inks or mica powders
Wax Paper / Protective covering over table
Paper Transfer Tape, low tack Contact Paper,
masking tape, removable
vinyl or resin tape
Or this Paper Transfer Tape
*Avoid using permanent vinyl!
Gloves and Respirator Mask
Tweezers, toothpicks, small paintbrushes
Bowls to contain your glass (dollar tree has these)
Stir stick and cup for blending resin or these
Hairdryer or Heat Gun
optional 91% isopropyl alcohol to assist in popping bubbles
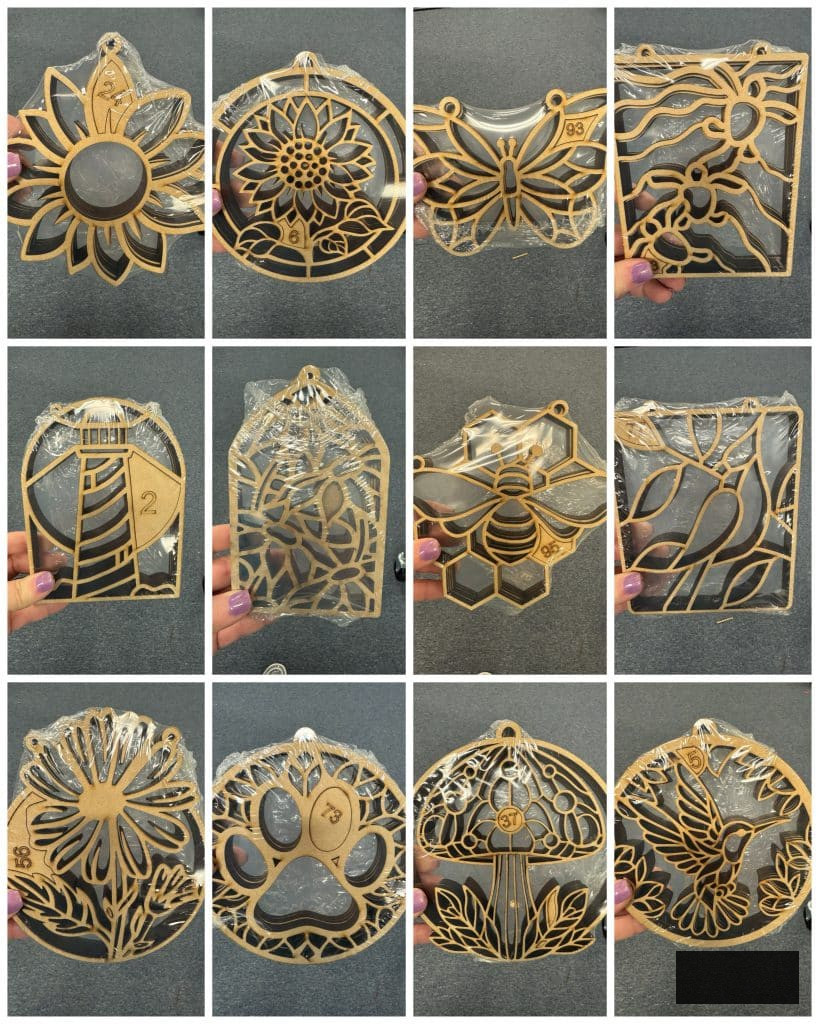
Butterfly Cutout and Glass Kit Q (style 93)
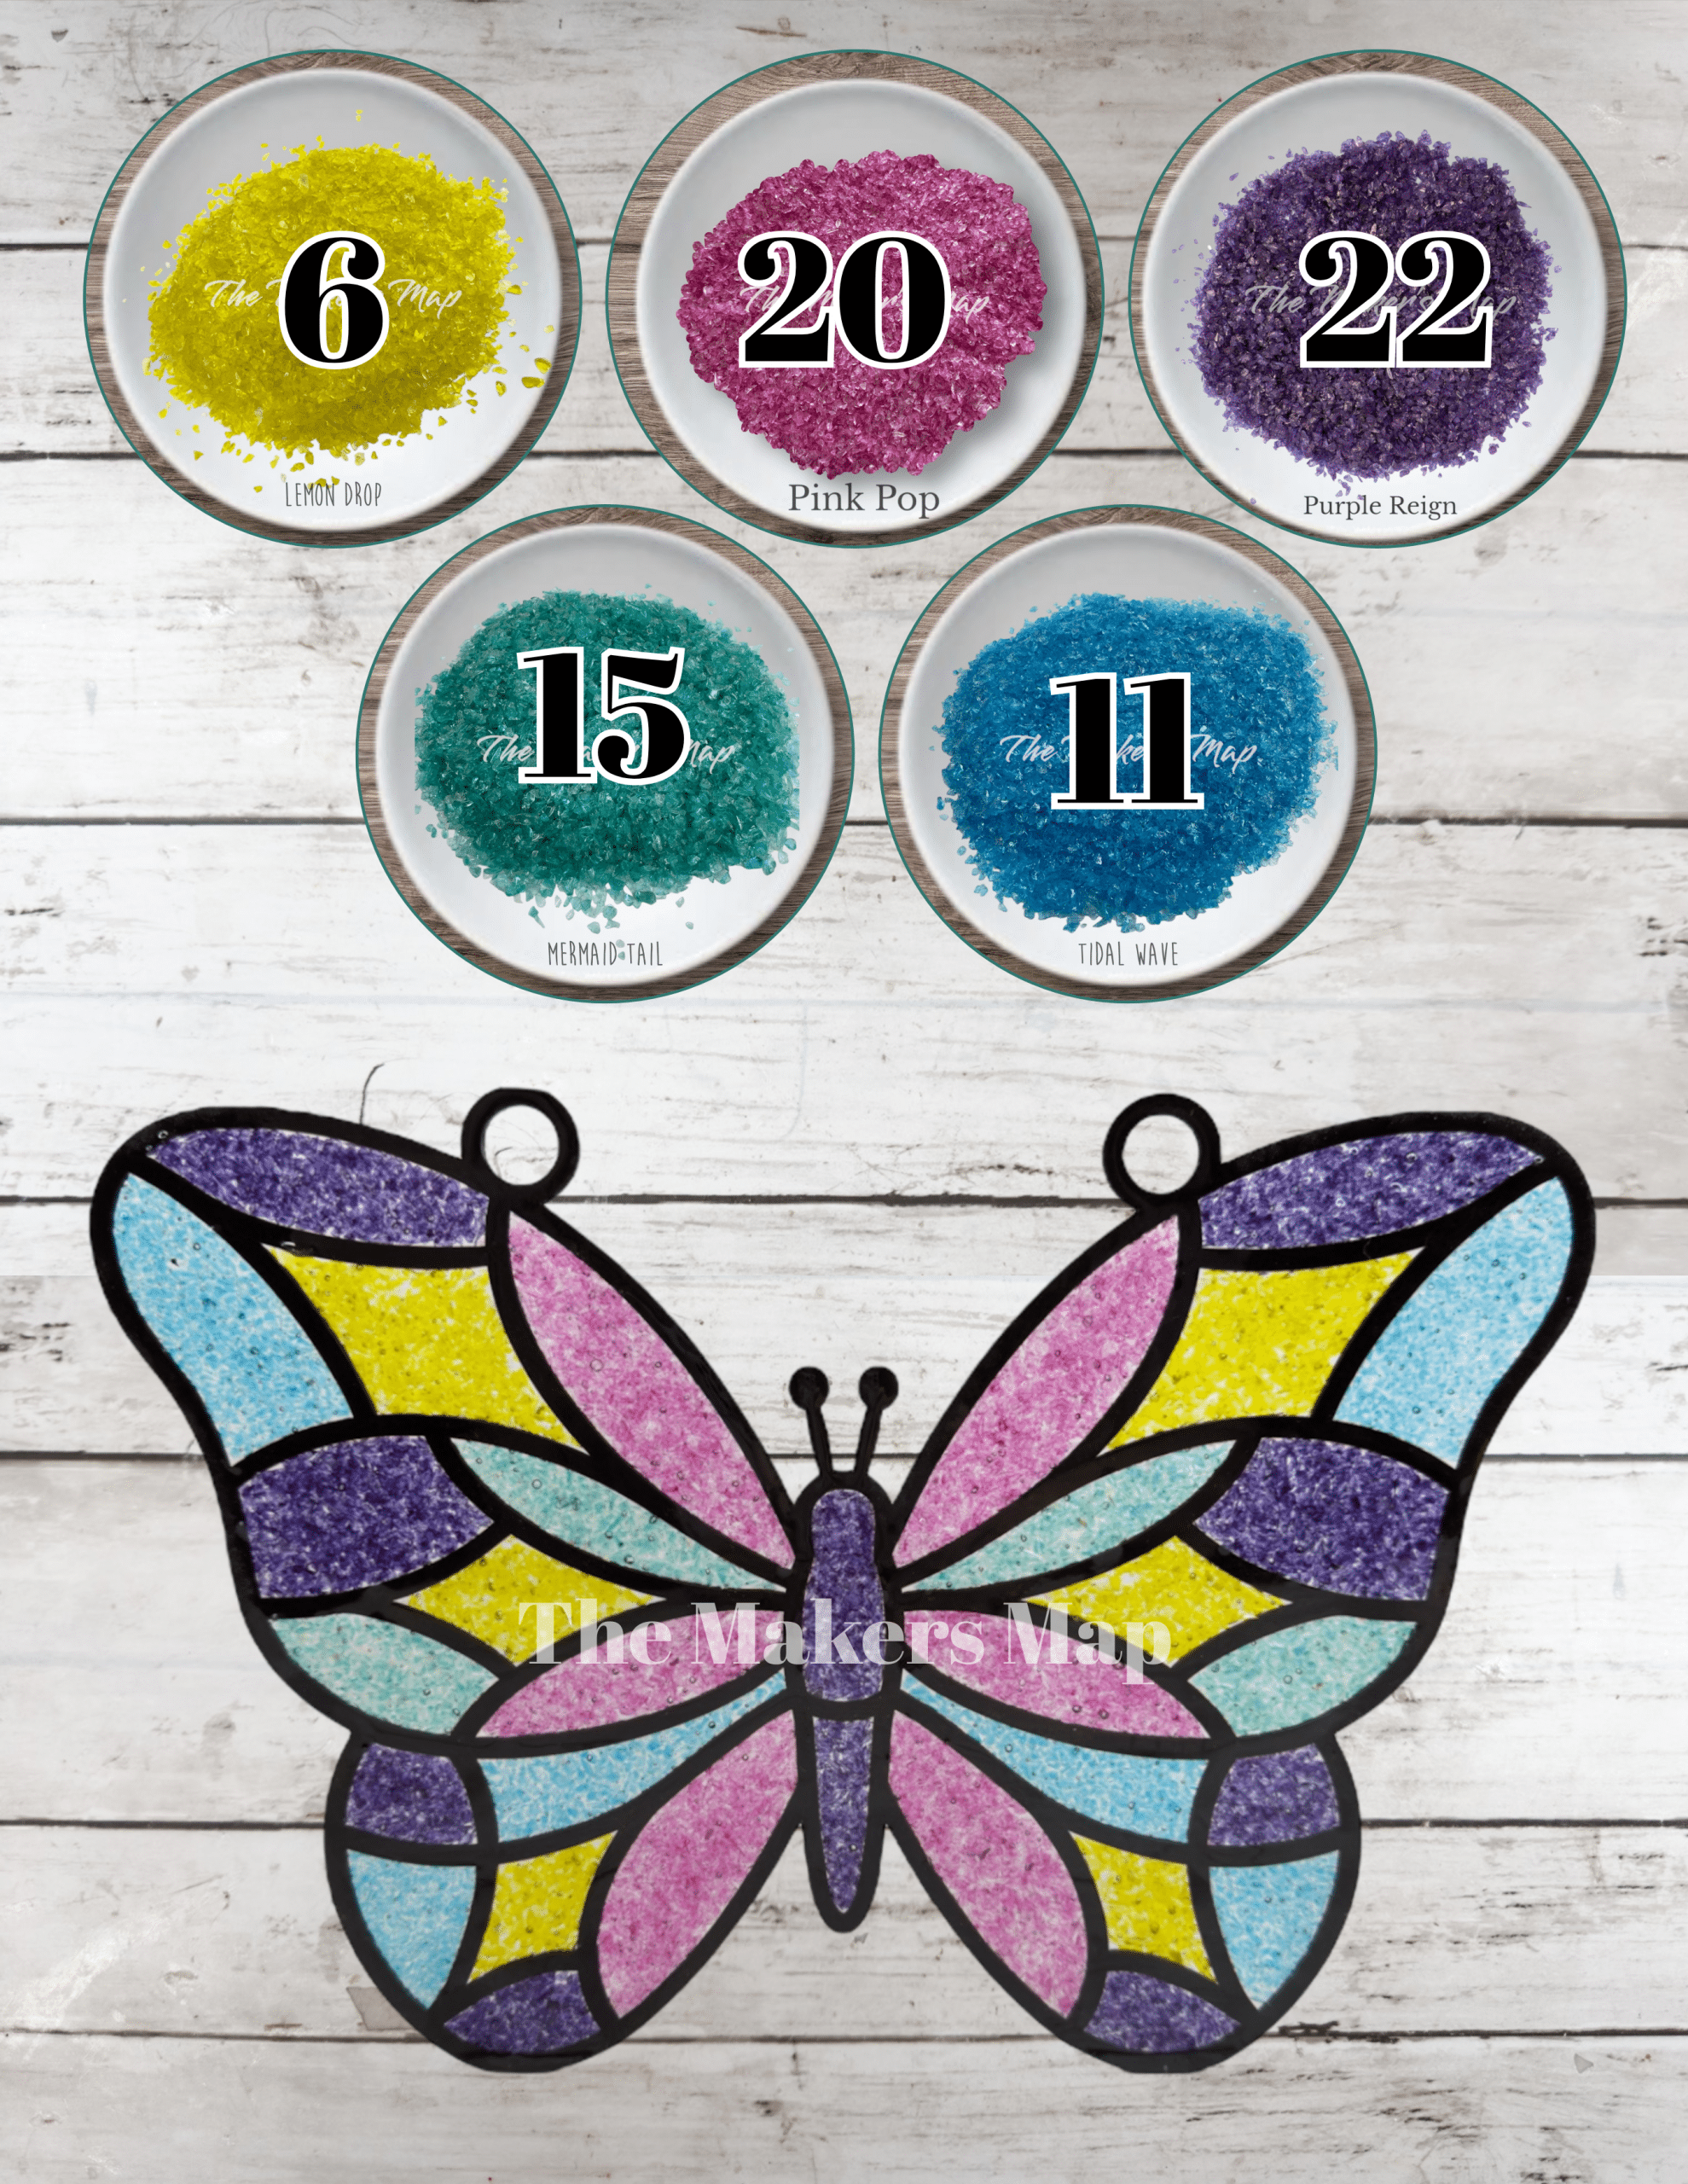
We provide a ready-made kit for you to create a DIY Faux Stained Glass Hummingbird Sun Catcher. The kit contains outline style 93, along with all glasses featured in the image above. Purchase the Butterfly Sun Catcher Kit Here
Explore all DIY Faux Stained Glass Sun Catcher Kits here
Thank you for visiting! XOXO Amber
You can also browse my ENTIRE AMAZON Favorites shop just click here!It’s filled with all the items I utilize and adore. Here’s the materials list I highly suggest every creator have available!!
Would you also pin my blog for future reference and subscribe to my newsletter alerts?I would be thrilled to have you join my #craftycrew.
Feeling inspired? Drop me a comment below! I cherish feedback from my readers!

Join my complimentary “Crafting and Sharing” Facebook group!