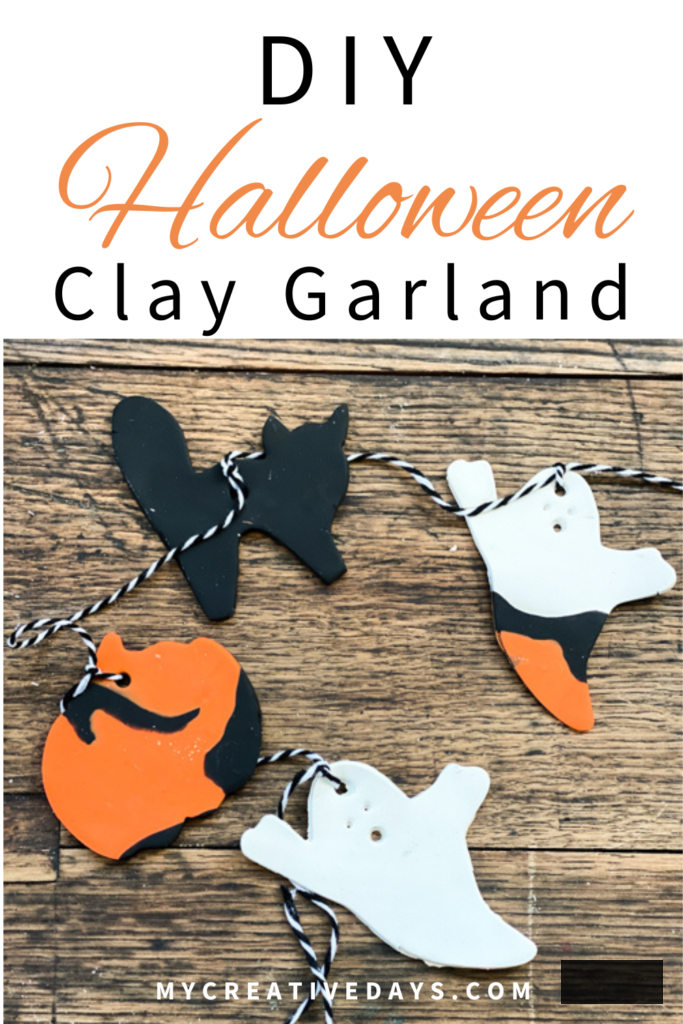
Halloween is just around the corner, and there’s no superior method to immerse yourself in the eerie ambiance than by creating your own DIY Halloween Clay Garland. This enjoyable and straightforward project is ideal for incorporating a distinct, handcrafted flair to your Halloween decorations. In this detailed tutorial, you will discover how to fashion a stunning garland using air-dry clay and a handful of uncomplicated materials.
{Affiliate links are included in thispost. Click on any highlighted links to discover the products and sources I am mentioning. You can read my disclosureHERE.}
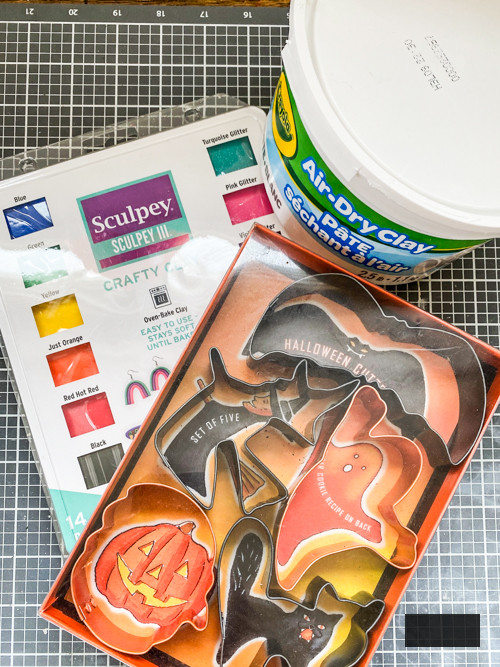
Materials Required
Before you start crafting your DIY Halloween Clay Garland, collect the following items:
***NOTE: I utilized the air-dry and oven-bake clay as I already had them available. It’s not necessary to procure both. The oven-bake version offers more hues, but if you possess the white air-dry, you can always paint the figures once they are dry.
Detailed Instructions
1. Organize Your Workspace
Begin by establishing a tidy, flat workspace. Protect the surface with parchment paper or a craft mat to avoid the clay sticking.
2. Roll the Clay
Take a piece of your clay and roll it out to approximately 1/4-inch thickness using a rolling pin. Achieving an even thickness will enhance the professional appearance and uniformity of your DIY Halloween Clay Garland. Be cautious not to roll it too thin, as the shapes may break easily.
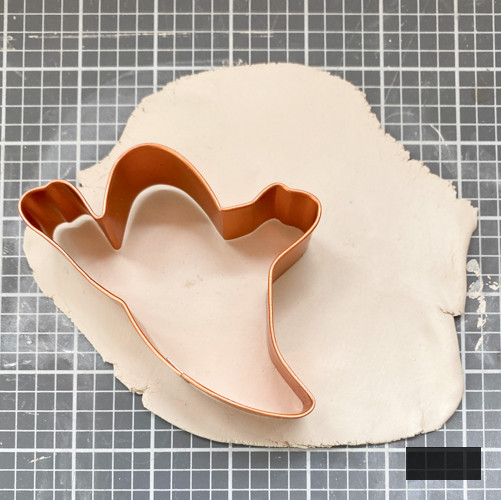
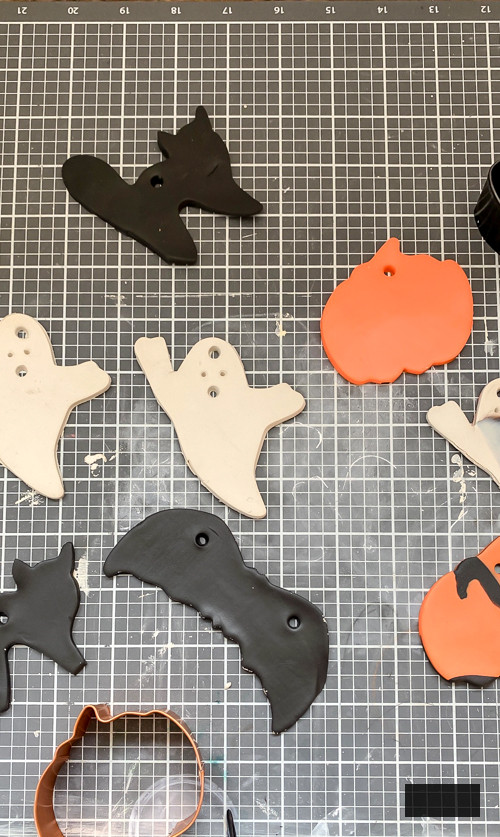
3. Cut Out Halloween Figures
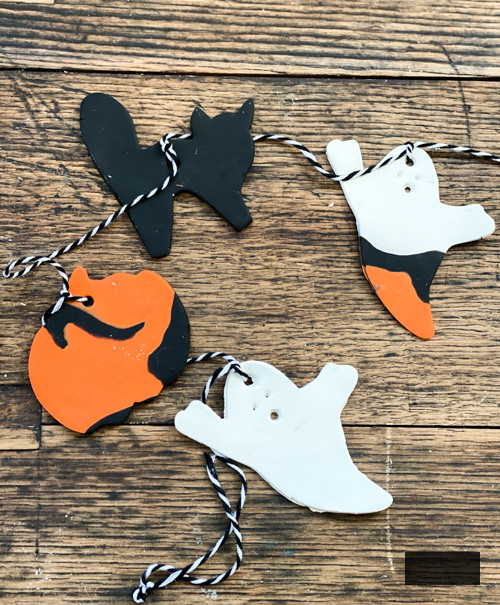
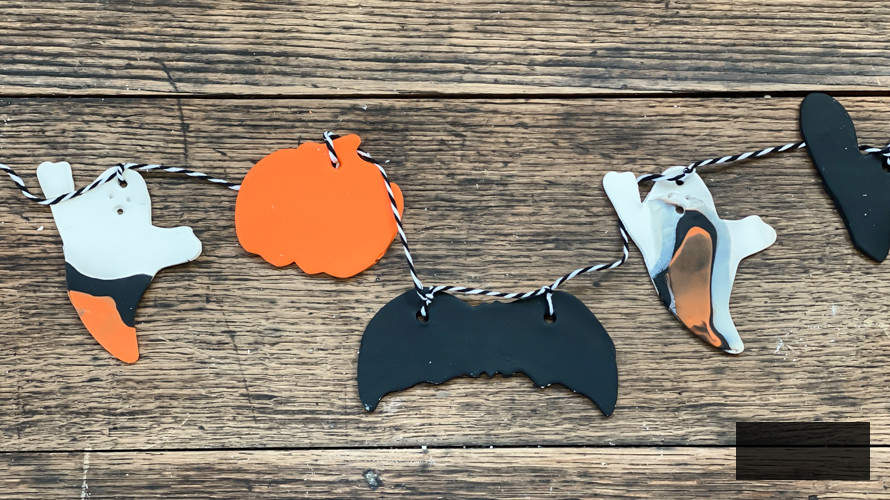
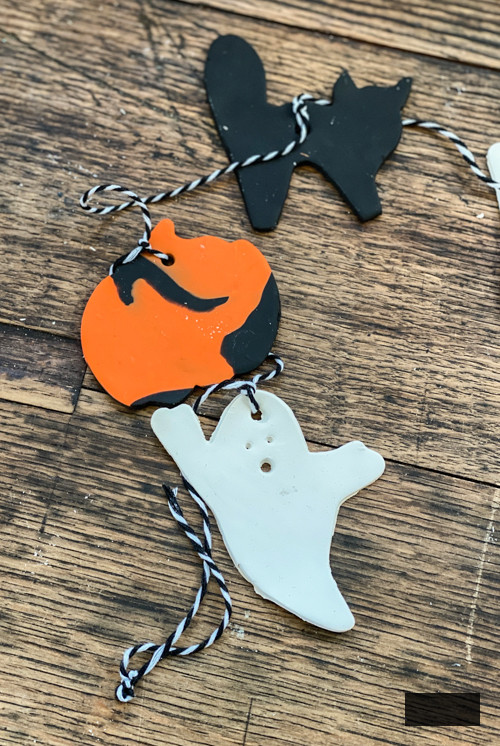
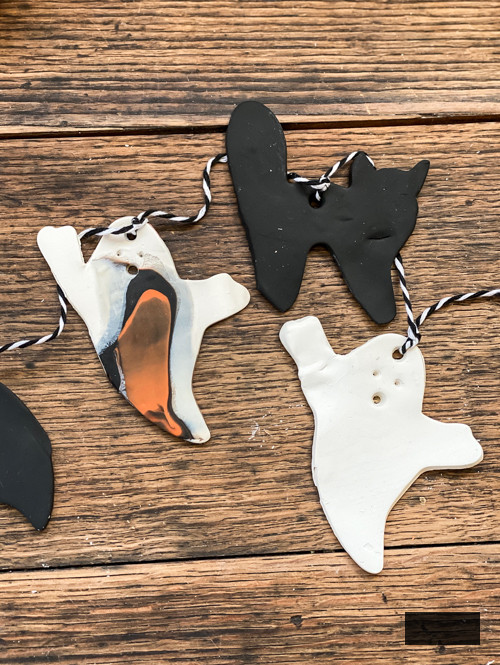
Using your Halloween-themed cookie cutters, press into the clay to carve out your eerie figures. Ghosts, pumpkins, and bats are traditional selections for your DIY Halloween Clay Garland, but feel free to unleash your imagination with other Halloween symbols.
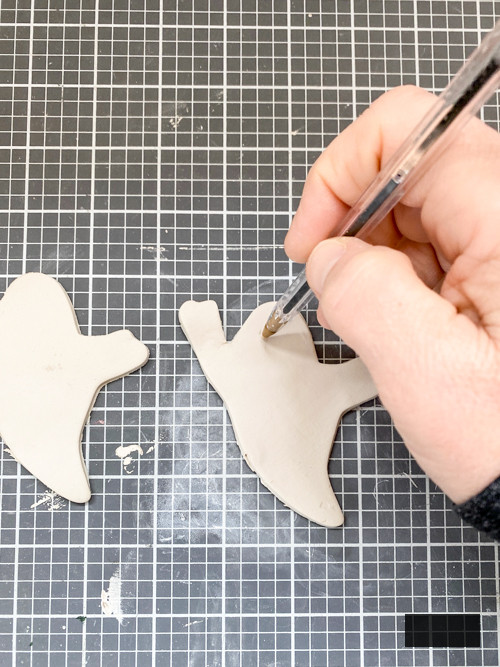
4. Punch Holes for Stringing
Once you’ve carved your shapes, use a skewer or pen cap to create a small hole near the top of each piece. This will be where you thread the twine later to hang your DIY Halloween Clay Garland. I included additional holes for the ghost’s faces too.
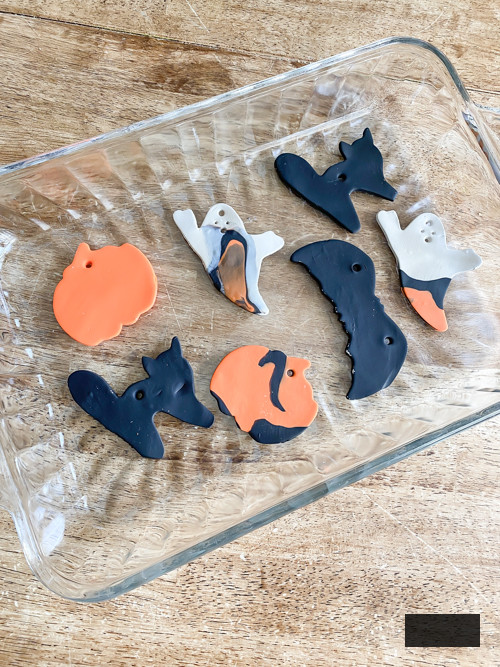
5. Allow the Clay to Cure
Let your air-dry clay figures cure completely. Depending on the thickness of your figures, air-dry clay may take anywhere from 24 to 48 hours to set. Ensure they are adequately dry before proceeding to avoid any cracks or damage. I baked my oven-baked figures at 275° for 15 minutes.
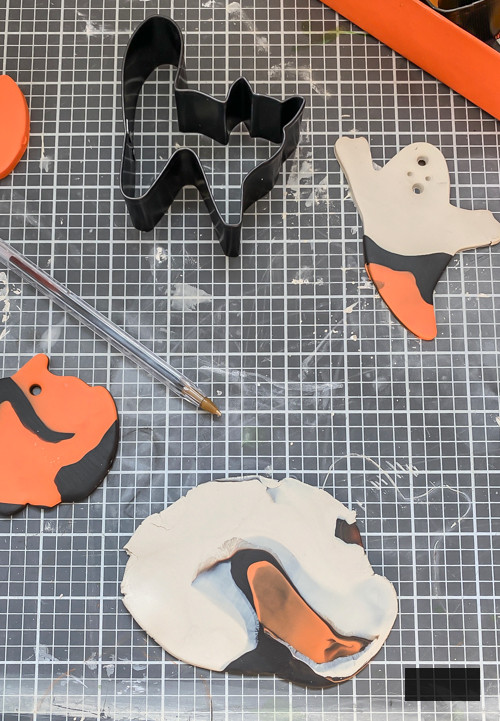
6. BONUS IDEA
I dislike discarding supplies. I had a little black, orange, and white clay leftover. There wasn’t enough of each color to cut out another shape individually, but when I combined them, I managed to get a couple more shapes carved. I joined them in my hands first, then rolled them out with the rolling pin. This resulted in a marbled Halloween appearance. This look is incredibly fun! I did mix the air-dry clay with the oven-bake clay and placed them in the oven. It worked out well.
7. Thread the Figures onto the Twine
Now it’s time to put together your garland. Cut a piece of twine or string that’s appropriate for the location where you intend to hang your DIY Halloween Clay Garland. Lace the twine through the holes in each figure, ensuring they are spaced evenly.
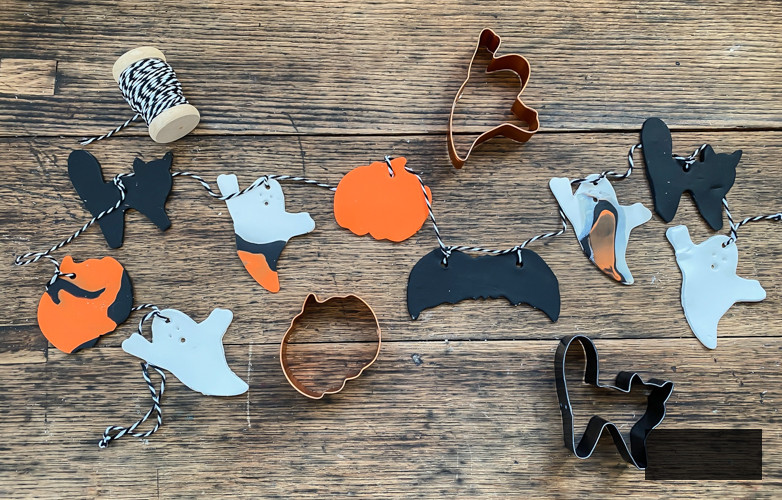
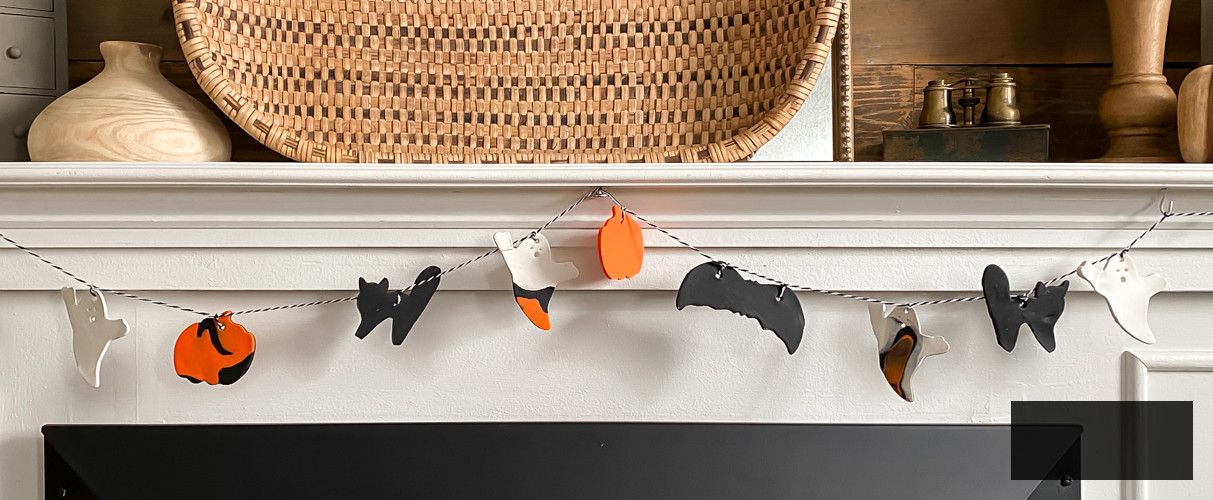
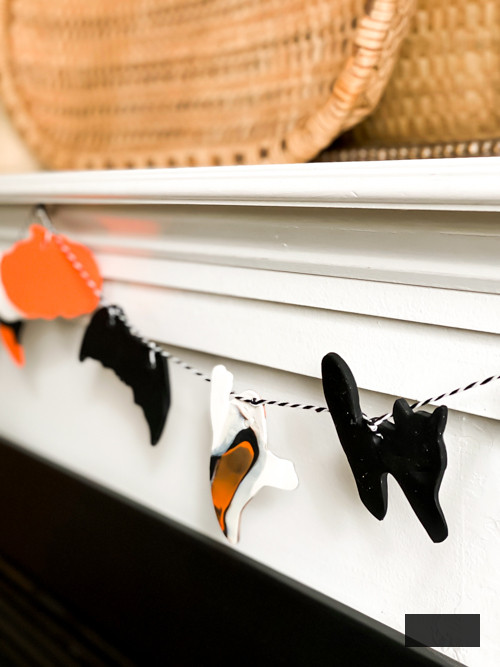
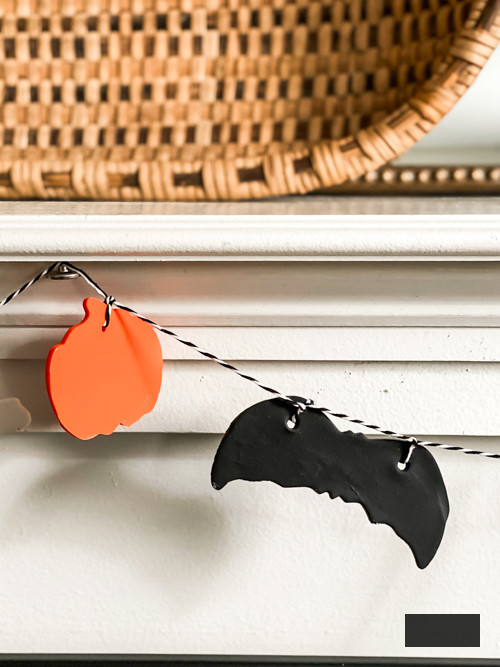
8. Display Your Garland
Your DIY Halloween Clay Garland is now ready for showcase! Hang it over your mantle, along a staircase railing, or above a doorway to infuse a festive, spooky element into your home.
Personalization Suggestions for Your DIY Halloween Clay Garland
- Incorporate Beads or Jingles: For added embellishment, think about incorporating beads or tiny jingles among your clay figures.
- Add Sparkle: Introduce a bit of shimmer by dusting glitter over the wet paint before it dries.
- Multi-Layered Effect: Produce several garlands and layer them to achieve a more abundant, dramatic appearance.
Reasons to Create Your Own Halloween Clay Garland
Creating your own Halloween decorations not only lets you personalize your décor but also infuses a unique, artisanal feel into your home. A DIY Halloween Clay Garland is an easy project that delivers striking results, making it an excellent choice for both novices and seasoned crafters. Additionally, it’s a delightful activity to enjoy with family or friends while preparing for the Halloween festivities.
You can view me crafting this garland live on my YouTube channel HERE. Don’t forget to SUBSCRIBE while you’re there since I am uploading new videos every week! I wouldn’t want you to miss any of them!
SAVE THIS POST!
If you enjoyed this simple project, you might also appreciate these:
DIY Pottery Barn Jack-O-Lantern Replica
DIY Desktop Ghosts
Weathered Copper Jack-O-Lanterns DIY