Sure! Here’s your text with synonyms replaced and the structure altered while keeping the HTML tags and format unchanged:
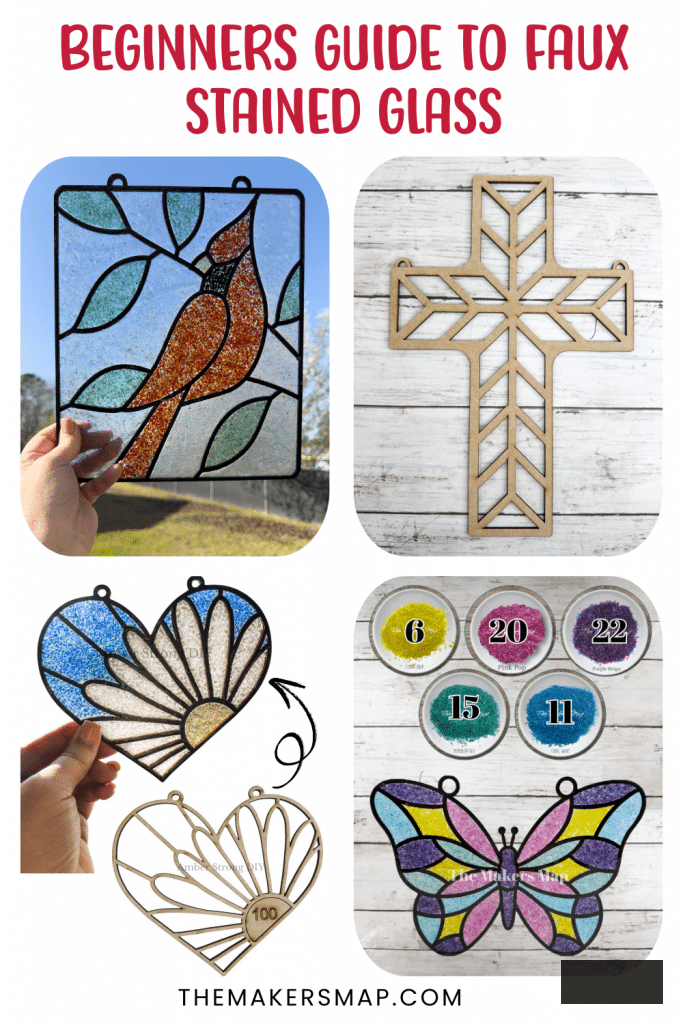
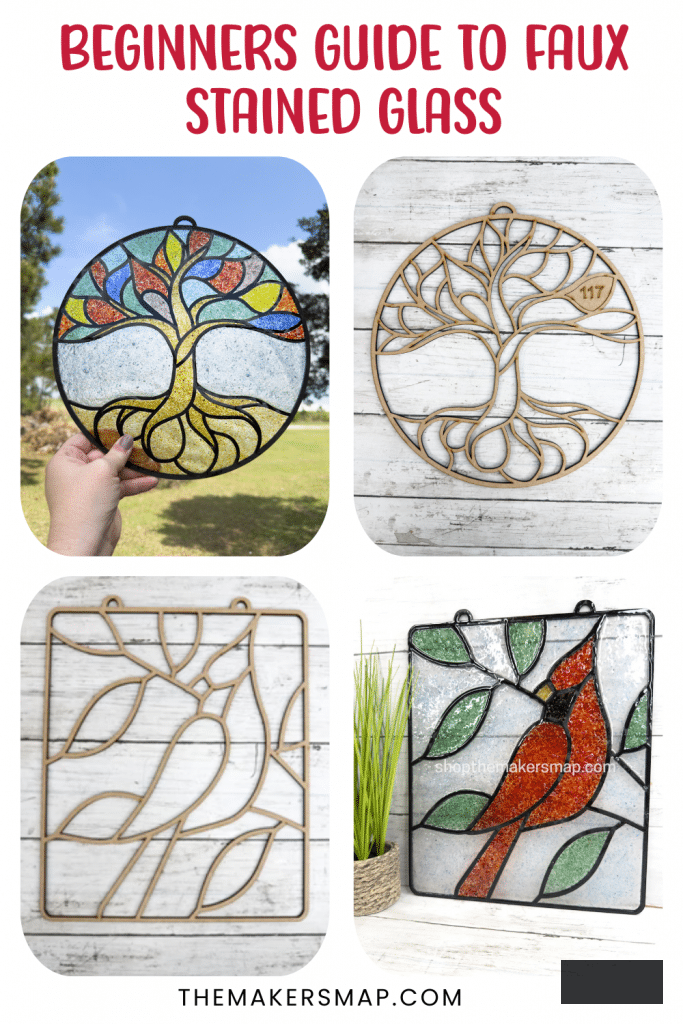
This is the Beginner’s Handbook to Imitation Stained Glass Sun Catchers featuring Laser-Cut Wood frame designs, finely crushed glass, and resin. This article will present a collection of straightforward step-by-step guides to assist you in getting underway!
Explore the tutorial collection below; it is the Beginner’s Handbook to Imitation Stained Glass Sun Catchers utilizing Laser-Cut Wood
SHOP MY CRAFT KITS
A Beginner’s Handbook to Imitation Stained Glass Sun Catchers
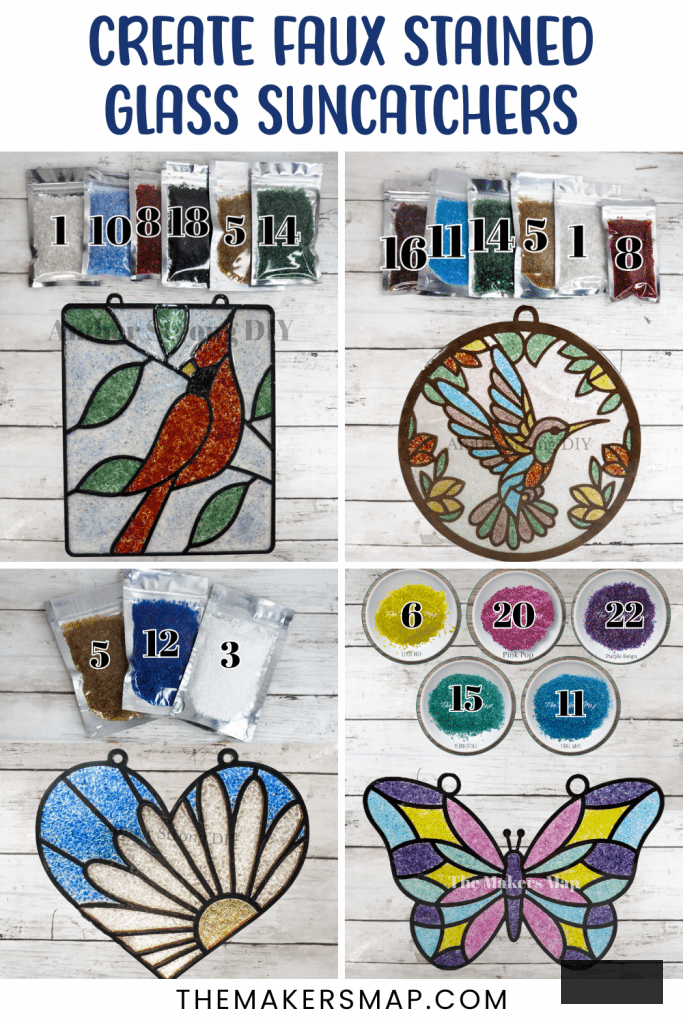
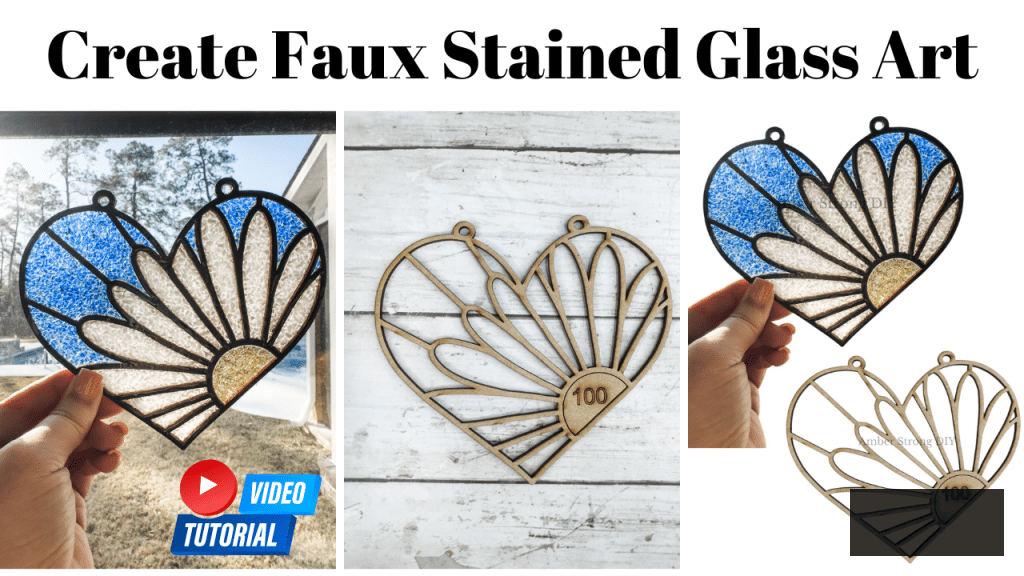
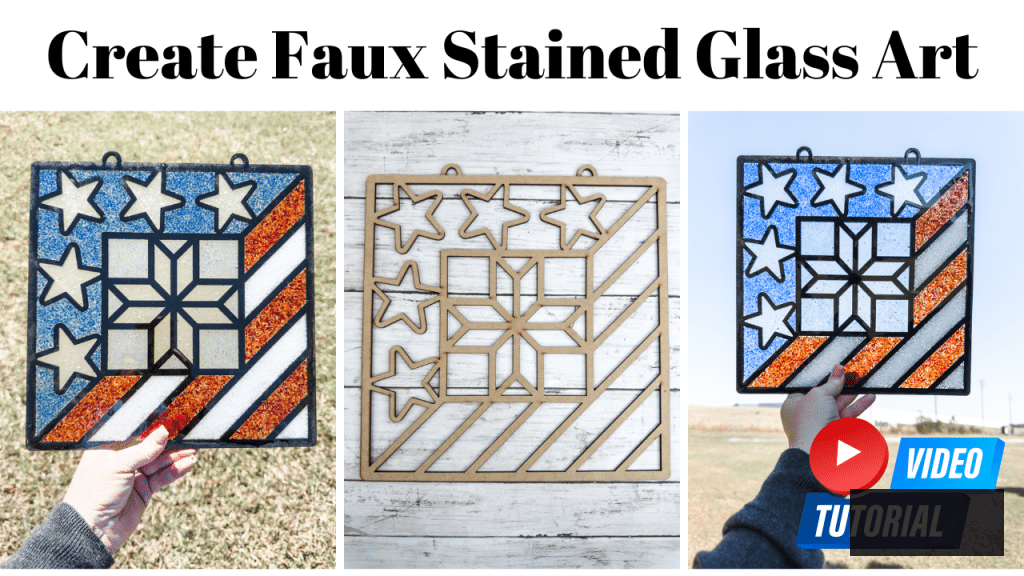
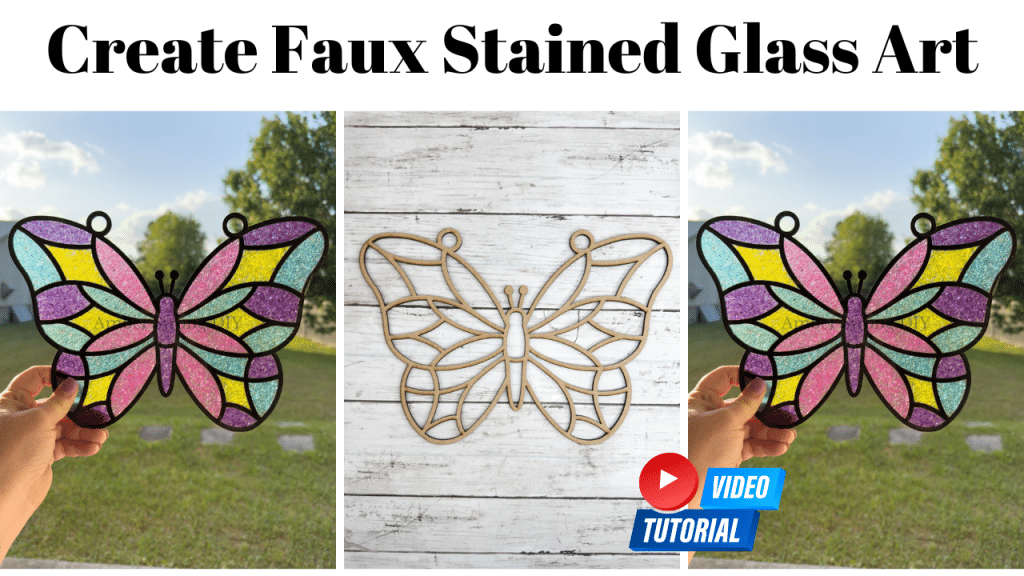
Discover how to Craft Imitation Stained Glass Sun catchers using Laser-Cut Wood, Crushed Glass, and Resin
Ever gazed at a stained glass window and wished, “I wish I could create something that stunning”? Great news—you can! Imitation stained glass sun catchers made from laser-cut wood enable beginners to engage in this vivid, light-catching art with assurance. No need for glass cutting or specialized tools.
If you’re anything like me and feel uncertain about your ability to cut glass or create perfect lead bead lines, or solder, then you’re in the correct spot! I’m here to guide you as you begin.
This Beginner’s Handbook to Imitation Stained Glass Sun Catchers with Laser-Cut Wood will demonstrate how to get started, step by step, even if you’ve never utilized resin or worked with shattered or crushed glass before. With just a handful of supplies and a dash of imagination, you’ll be amazed at what you can produce!
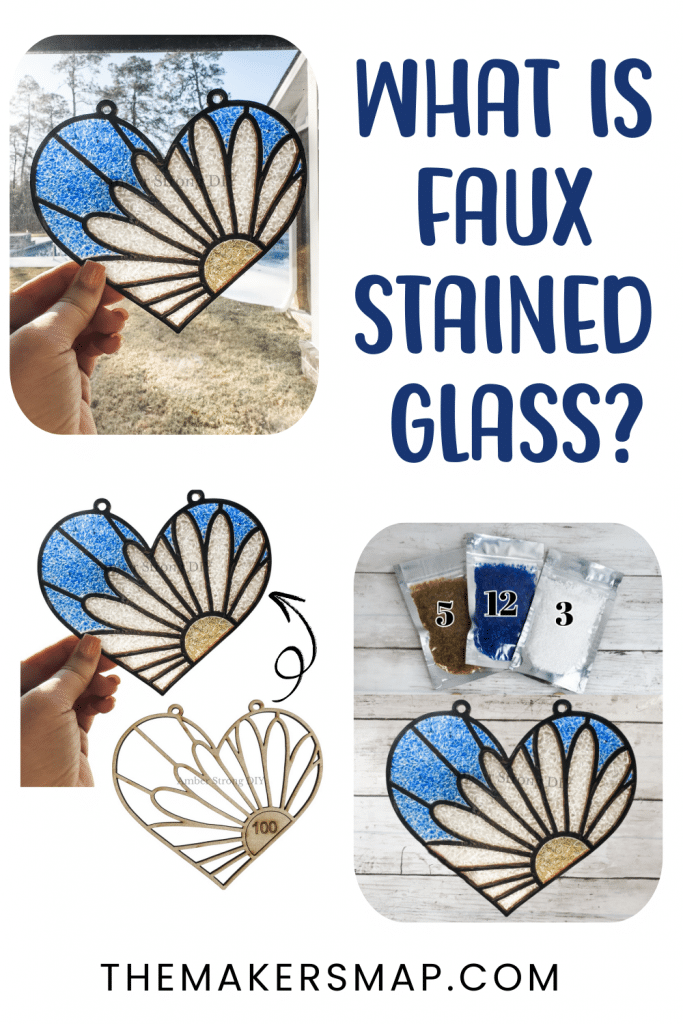
What Is Imitation Stained Glass?
Imitation stained glass is a novice-friendly method to achieve the appearance of classic stained glass using crushed glass, resin, and a solid wood framework. It still captures sunlight beautifully and adds a handcrafted charm to your windows, crafting space, or patio. Plus, these imitation stained glass creations make fantastic gifts!
Best of all, it’s suitable for all abilities—especially first-time creators who seek a remarkable outcome without the hassle.
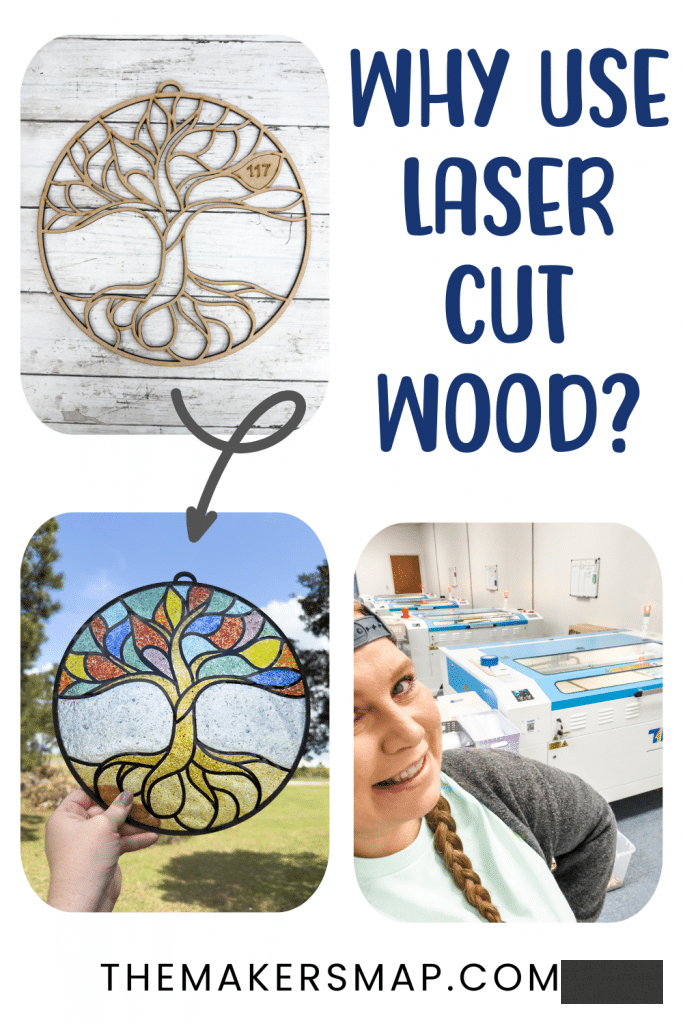
Why Laser-Cut Wood Simplifies the Creation of Imitation Stained Glass
Laser-cut wood outlines serve as your template, simplifying the process and making it enjoyable. These laser-cut wooden frames boast intricate designs—such as hummingbirds, butterflies, flowers, and hearts—allowing you to bypass the challenging bits and plunge right into the enjoyment.
No soldering, lead bead lines required. Just paint or stain the wood frame outline, and you’re ready to fill the gaps with shattered or crushed glass.
All our wood outline frames are manufactured in our facility located in Rincon, Georgia. That’s right—our wood cut-outs are crafted in the USA!
If you’ve ever felt hesitant about embarking on a new craft, these wood frame outlines will provide the framework and encouragement necessary to begin with assurance.

“As an Amazon associate, I may receive a small commission if you make a purchase. There is no extra cost to you!”
Materials You’ll Require to Craft Imitation Stained Glass Sun Catchers
View my complete Amazon Favorites list here!
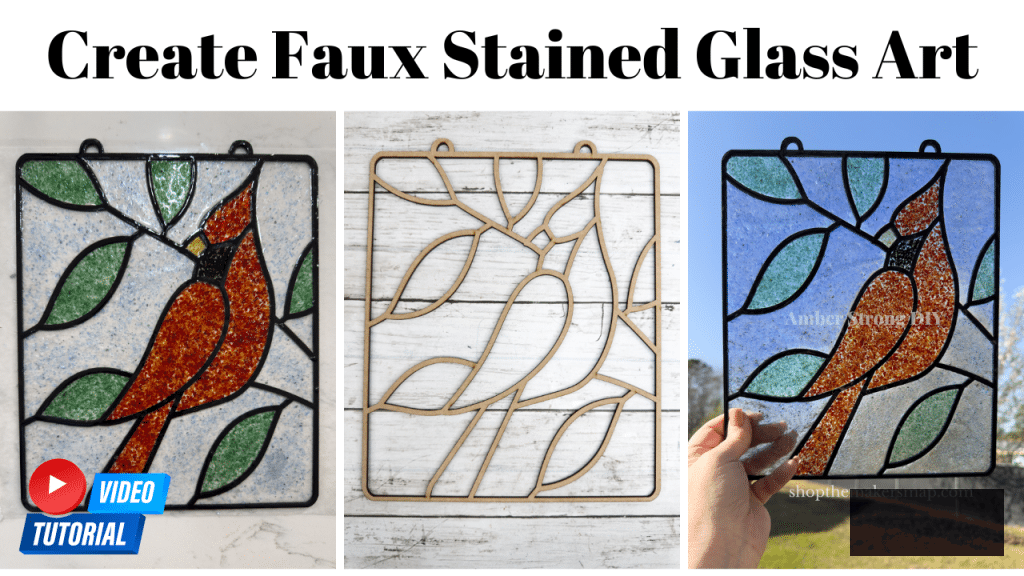
Detailed Instructions for crafting sun catcher glass art:
Obtain the downloadable guide here!
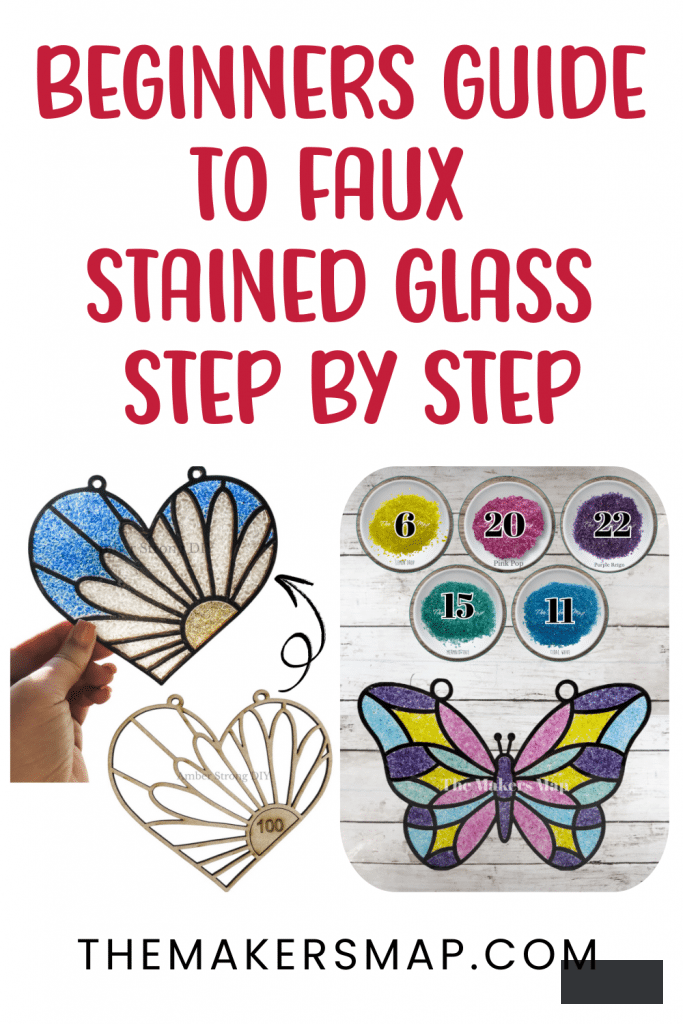
Step By Step – Beginner’s Handbook to Imitation Stained Glass
- Begin with a laser-cut design – Select from an extensive array of shapes such as cardinals, hummingbirds, crosses, flowers, and more. You can obtain laser-cut wood designs from my shop in 6 inch, 12 inch sizes, as well as bulk pack options that are ideal for craft parties, painting gatherings, classes, and workshops.
- Color or stain the wood cutout
– Prior to commencing, apply paint or stain to the wood to furnish it with a refined, finished appearance. Allow it to dry thoroughly.
- Subsequently, Attach paper transfer tape to the rear – You will need to utilize paper transfer tape. Ensure there is some overhang so that you can turn the wood cut-out while filling it with glass. Start by determining which side of your wood cut-out will serve as the back. Position that side down on the adhesive side of the paper transfer tape. This assists in securing the shattered glass in position and prevents the resin from seeping through. You may choose to use a rolling pin or brayer to help ensure the wood adheres to the adhesive of the paper transfer tape. This process is referred to as masking.
- Incorporate color with crushed glass – During this stage, you will select your hues of fragmented glass, crushed glass, crushed shell, glitter, or mica powders blended with resin. There are countless methods to fabricate faux stained glass. Once you have made your choices, begin by filling each segment with your selected colored crushed glass to imitate the appearance of traditional stained glass. This segment might necessitate the use of tweezers if glass spills into other openings.
- Prepare the epoxy resin – Depending on the resin you have selected, mix the resin per the manufacturer’s instructions. Ensure you wear gloves and a mask, and confirm that your workspace is protected. Use wax paper or cardboard. You will require a mixing cup and an item like a popsicle stick to stir the resin. Mix gently to minimize the introduction of air bubbles.
- Pour the Resin- Gently drizzle the resin over the glass segments, ensuring that all areas are covered and evenly layered. Most resin is self-leveling. Take care not to overfill. I prefer to coat my wooden frame outlines, but you might choose to omit that step. A dropper can also be utilized to dispense the resin over the glass. TIP: Utilize heat to assist in removing bubbles, or lightly spray the surface with 91% isopropyl alcohol to help eliminate bubbles. Set aside to cure.
- Allow it to cure, then remove the tape – After the resin has completely cured, carefully peel away the paper transfer tape from the back. Some transfer tapes might leave a sticky residue. If you encounter this issue, I use mod podge to seal the back. This has only occurred for me a few times. You can also use isopropyl alcohol to gently clean and remove the sticky residue.
- Attach a chain for hanging and displaying – Now that your faux stained glass sun catcher craft has cured, Complete your sun catcher by affixing a chain or ribbon and hanging it in a sunny window to beautifully capture light. Remember, all resin can yellow over time, so I recommend displaying your sun catcher in a sheltered spot, avoiding direct sunlight.
- Cleanup- Ensure proper cleanup of your workspace. If you need to clean resin, isopropyl alcohol can be used to wipe it away. If there is leftover resin, allow it to cure before disposal, or pour the excess resin into a small mold to make better use of the product and minimize waste. Dispose of gloves, cups, stir sticks, and other items in the trash.
- Wash your hands- It is essential to wear appropriate personal protective equipment and gloves. Wash your hands with soap and water after completing the faux stained glass sun catcher using wood frame outlines.
- TIP: Use a mask- It is advisable to wear a mask or respirator, and to work in a well-ventilated area while using resin.
You Can Achieve This – Even If You’re A Novice!
Exploring a new craft can feel daunting—but this project is designed to enhance your creative confidence. The steps are straightforward, the materials are accommodating, and the outcomes are genuinely gratifying.
Here’s why this Beginner’s Guide to Faux Stained Glass Sun Catchers with Laser-Cut Wood is ideal:
- Rapid achievements: You can complete a sun catcher in an afternoon.
- Artistic latitude: Select your own colors and styles.
- Minimal equipment: No specialized tools or prior knowledge required.
- Opportunity to advance: After creating one, you’ll be eager for more!
- Crafting with Companions: You can craft alongside friends or family and learn together!
Where to Acquire a Beginner Starter Kit
You can gather your wood outlines and glass essentials all in one place at The Makers Map Shop, where laser-cut wood sun catcher outlines and beginner-friendly kits are available. You can also choose from over 120 single outline designs and crushed glass created specifically for crafters like you. NOTE: We do not have resin in stock currently, but it is coming soon!
Crushed Glass For Crafting
We utilize recycled crushed glass to produce our faux stained glass artwork.
Explore the complete glass collection here.
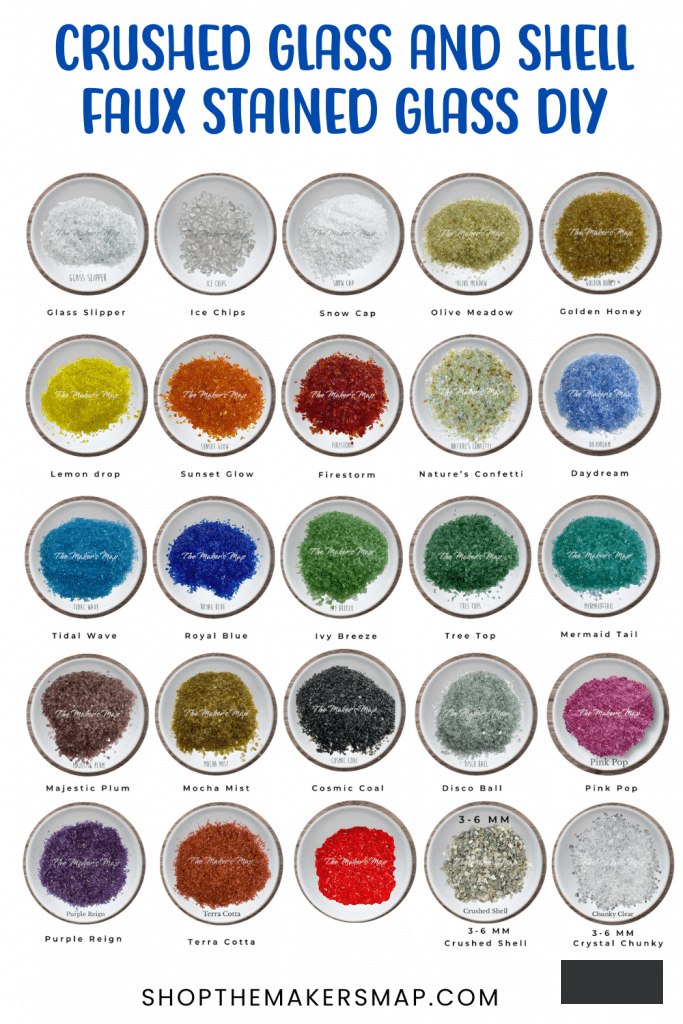
We also offer natural crushed shell if you wish to incorporate a touch of coastal nature aesthetic into your sun catcher creations.
Final Reflections: Begin Today, Shine Tomorrow
Crafting your own faux stained glass sun catcher isn’t solely about making something visually appealing—it’s about trusting in your abilities. With just a little guidance, you’ll gain the assurance to transform basic materials into something you’ll be proud to display or gift. I can’t wait to see what you bring to life.
Faux Stained Glass Sun Catchers with Laser-Cut Wood
So go ahead—take that initial step, and let your creativity radiate.
It’s beginner-friendly, therapeutic to create, and entirely customizable to fit any theme or season.
Be sure to explore the tutorials below to help you get started!
Check out these beginner faux stained glass tutorials below.


Thank you for visiting! XOXO Amber
You can also explore my ENTIRE AMAZON Favorites store by clicking here! It’s filled with everything I utilize and adore. Here is the supply list that I wholeheartedly recommend every creator have readily available!!
Would you kindly pin my blog for future reference and join my newsletter alerts? I would be thrilled to have you as part of my #craftycrew.
Feeling inspired? Leave a comment below! I cherish feedback from my readers!

Become a member of my complimentary “Crafting and Sharing” Facebook group!